


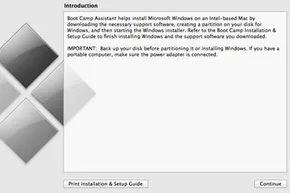
Backing up your Mac isn’t optional. It’s a prerequisite.
Before you touch the Boot Camp Assistant wizard, secure your data. If the partitioning process goes sideways, you don’t want to lose everything. Once you’re ready, the setup is straightforward, but it’s also permanent in specific ways. You can use Boot Camp Assistant later to remove or reinstall Windows, but you can’t tweak the partition sizes once they’re locked in.
To launch the tool, navigate to Finder > Applications > Utilities. Double-click Boot Camp Assistant.
Before the wizard opens, you need three things:
- A Windows 10 ISO file.
- A blank USB drive (16 GB or larger, MS-DOS formatted). Note: You might not need this. Macs running macOS 10.15 (El Capitan) or macOS 11 (Big Sur) often handle installation without external media.
- Free space. Apple says 64 GB is the minimum. I recommend 128 GB. Windows updates are bloated. Give the OS room to breathe or it will choke.
Sourcing the Right ISO
Download the Windows 10 ISO from Microsoft. But don’t just grab any file. You need the full 64-bit version of Windows 10 Home or Pro. Not an updater. Not a mobile variant. The full desktop install.
Apple has specific demands for this process. Update your macOS to the latest version your hardware supports. Apple frequently patches Boot Camp drivers in major OS updates. Running outdated software leads to driver conflicts that make Windows feel like a hostage situation.
If you’re unsure how to proceed, click the Open Boot Camp Help button inside the assistant. It links directly to Apple’s support pages. They have detailed instructions. Follow them.
The Partition Slider Trap
When you click Continue on the introduction screen, you’ll see a slider. This controls the split between macOS and Windows.
Warning: Apple states that partition sizes cannot be changed after setup.
This isn’t a suggestion. It’s a hard constraint. Set the sizes carefully. If you allocate too little space to Windows, updates will fail. If you give it too much, you’ll cripple macOS. There’s no undo button here.
Above the slider is the option to Choose a Windows 10 ISO file. Point the assistant to the file you downloaded. Once you lock in the partition sizes and select the ISO, the Install button activates.
The assistant will copy files, create the Windows partition, and reboot your Mac. It installs Windows itself first. Then, it installs the necessary support files. Drivers. Utilities. The glue that holds the dual-boot experience together.
When the Mac restarts, you’re in Windows. Or you’re stuck in a loop. Hopefully, the former.
The hardware is ready. The OS is installed. But the real work begins once Windows loads. Drivers need configuration. Network settings need verification. You’re no longer on macOS. You’re on borrowed time in a different ecosystem.


